Most people who "learn to type" never actually learn. They get faster at hunting for keys, plateau around 30 words per minute, and spend the rest of their working lives glancing down at the keyboard a few hundred times a day. Touch typing is the skill that ends that, and for a complete beginner it takes a few weeks of short, deliberate practice, not months of grinding.
This guide covers the whole path from zero: what touch typing is, where your fingers go, which finger owns which key, a week-by-week routine, the mistakes that stall beginners, and what to expect from each stage. It sits inside our wider guide to learning how to type, which goes deeper on practice texts, tools and speed benchmarks once you have the basics down.
What is touch typing?
Touch typing is typing with all ten fingers without looking at the keyboard. Each finger owns a fixed set of keys, and your hands return to the same resting position after every keystroke. Over a few weeks that repetition becomes muscle memory, the same way a pianist stops watching their hands.
The payoff is not only speed. The average hunt-and-peck typist manages about 25-30 WPM and has to split attention between the screen and the keys. A trained touch typist sits comfortably at 60-80 WPM with eyes on the screen the whole time, and some reach 100+ WPM. That is roughly a 3x difference on every task that involves a keyboard, and the compounding effect of typing speed on daily work is larger than most people expect. Our overview of basic typing skills lists the ten habits that make up the skill if you want the checklist version.
Where do your fingers go? The home row
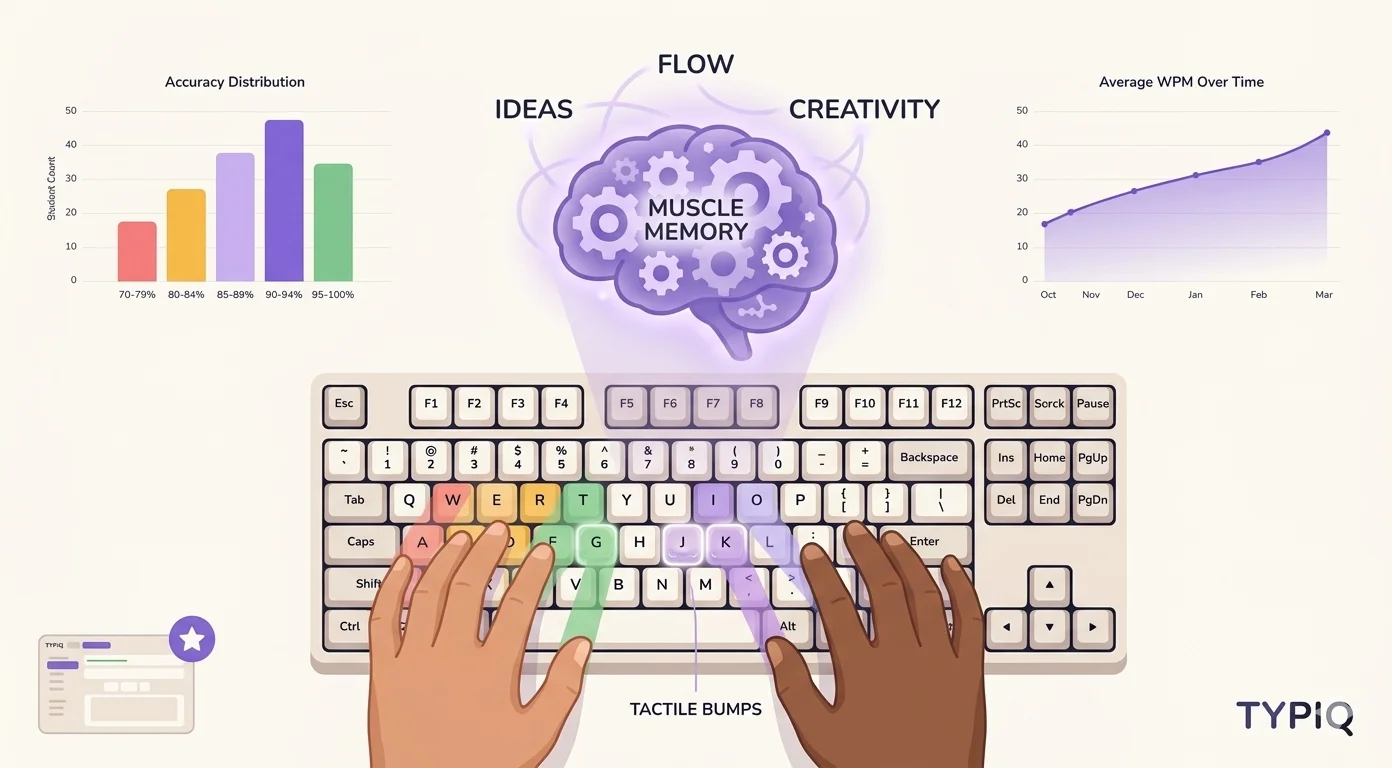
Every touch-typing method begins with the home row, the eight anchor keys in the middle row of your keyboard. This is where your fingers rest between keystrokes:
- Left hand: A, S, D, F (index finger on F)
- Right hand: J, K, L, ; (index finger on J)
- Thumbs: rest on the space bar
Most keyboards have small raised bumps on the F and J keys. They are there so you can find the home position by feel, without looking. Before every practice session, put both index fingers on the bumps, let the other fingers fall onto their keys, and keep your wrists floating just above the desk rather than resting on it.
Which finger presses which key?
Each finger is responsible for a diagonal column of keys that runs from the number row down to the bottom row. Here is the standard assignment on a QWERTY keyboard:
Left pinky:   Q, A, Z, 1, Tab, Caps Lock, Shift
Left ring:    W, S, X, 2
Left middle:  E, D, C, 3
Left index:   R, F, V, T, G, B, 4, 5

Right index:  Y, H, N, U, J, M, 6, 7
Right middle: I, K, comma, 8
Right ring:   O, L, period, 9
Right pinky:  P, semicolon, slash, 0, Enter, Shift
The index fingers do the most work because they each cover two columns. The pinkies cover the fewest letters but the most modifier keys, which is why Shift, Enter and Backspace feel awkward at first. On QWERTZ and AZERTY keyboards the letters move but the logic is identical: each finger still owns its column.
How should a beginner practise? A week-by-week routine
Do not try to learn every key at once. Add keys in layers, and only move to the next layer when the current one is accurate without looking:
- Weeks 1-2: home row only (A, S, D, F, J, K, L, ;). Type the letters in pairs and short nonsense words. Aim for accuracy, not speed.
- Weeks 3-4: add the top row (Q, W, E, R, T, Y, U, I, O, P). Keep accuracy at 95% or above before you move on.
- Weeks 5-6: add the bottom row (Z, X, C, V, B, N, M). You now know every letter key and can type real sentences slowly.
- Weeks 7-8: numbers and symbols. Practise the combinations you actually use, such as commas, full stops, apostrophes and the number row.
Fifteen to twenty minutes a day is enough. Short daily sessions beat long weekend ones because muscle memory consolidates between sessions, not during them. Start each session with two or three minutes of typing warm-up exercises on the home row, and if you are not sure what to type, our list of practice texts for every stage covers nonsense drills through to full paragraphs.
"Speed is a byproduct of accuracy. If you type correctly, speed will follow naturally."
Which mistakes slow beginners down most?
Three habits account for most of the stalls we see in the first month. Our longer list of common typing mistakes and how to fix them goes into the rest.
1. Looking at the keyboard
This is the hardest habit to break, because your eyes have been doing the work for years. Cover the keyboard with a cloth if you need to, and work through the practical ways to stop looking down. Your eyes belong on the screen, where the mistakes appear.
2. Skipping the home-row reset
After each keystroke, return your fingers to the home position. It feels slow in week one. It is what makes you fast in month three, because every key is always the same distance from a known starting point.
3. Chasing speed before accuracy
If your accuracy drops below 95%, slow down. Every error you type at speed is a wrong movement you are rehearsing, and it is far easier to speed up accurate typing than to unlearn a sloppy pattern. The trade-off is explained in detail in our piece on accuracy versus speed.
Do you need a typing tutor, or is a typing test enough?
A typing test tells you how fast you already are. It does not teach you where the keys are or which finger to use, and for a beginner that is the whole problem. A structured course introduces keys in layers and shows you, on screen, which finger should move. Once you can type every letter without looking, speed tests become useful for tracking progress; before that, they mostly measure your frustration.
How Typiq fits in
Typiq is a desktop typing tutor for Mac, Windows and Linux built around the sequence above. What it gives a beginner:
- An on-screen keyboard with colour-coded fingers, so you see which finger moves for each key as you type
- Lessons that add keys in layers, home row first, then the rows above and below, then numbers and symbols
- Progress per lesson, with words per minute and accuracy, so you know when a layer is ready to move on from
- Ten interface languages and their keyboard layouts, including QWERTZ, AZERTY and layouts with accented letters
- Kids Mode with a balloon-popping game for younger learners
It works fully offline, needs no account and stores nothing about you on a server. The Personal license is €22.99, paid once, with lifetime updates, and there is a free trial before you decide: 30 minutes of practice in the desktop app, or the first five lessons at typiq-app.com/try/ in your browser with no download at all.
How long does it take?
With 15-20 minutes of daily practice:
- 2 weeks: you are comfortable on the home row
- 1 month: you can type every letter without looking, slowly
- 2-3 months: you match or beat your old hunt-and-peck speed
- 6 months: 60-80 WPM is realistic for most adults
The key is consistency. The full timeline for learning touch typing breaks down what to expect week by week, including the plateau most people hit around week six.
Bottom line
Touch typing is learnable by anyone in a few weeks of short daily sessions: start on the home row, add keys in layers, keep accuracy above 95%, and never look down. Speed follows accuracy, not the other way round. A structured course gets a beginner there faster than a typing test ever will.
Frequently asked questions
Can I learn touch typing as an adult?
Yes. Adults learn the key positions as fast as children do; what takes longer is unlearning the hunt-and-peck habit. Fifteen minutes a day for four to six weeks is enough for most adults to type without looking.
How many words per minute should a beginner aim for?
Do not aim for a number in the first month. Aim for 95% accuracy on every layer of keys. Once all letters are in place, 40 WPM is a realistic first milestone and 60-80 WPM a realistic six-month target.
Should I look at the keyboard while learning?
No. Looking is the habit you are trying to replace. Use the bumps on F and J to find the home row by touch, and keep your eyes on the screen even when you make mistakes.
Does touch typing work on a laptop keyboard?
Yes. The letter positions are identical; only the key travel and the size of the Shift and Enter keys differ. Beginners can learn on either, and the skill transfers between a laptop and an external keyboard.
Do I need a typing tutor, or can I learn with a free typing test?
A test measures speed; it does not teach finger placement. For the first weeks, a structured course that introduces keys in layers is what builds the skill. Tests become useful later, for tracking progress.
What if my keyboard is not QWERTY?
The method is the same on QWERTZ, AZERTY and other layouts: each finger owns a column of keys and the home row is the middle row. Learn on the layout you use every day, and pick a tutor that supports it.